🌟 Check out the Skincare Tools Hub — interactive tools to analyze your skin type, hydration, acne risk, dark spots & more! Get personalized skincare recommendations now! 🌸

DIY Rice Enzyme Cleanser: A Gentle Homemade Exfoliating Cleanser

Foamy or Gel-like Texture – The cleanser in a marshmallow-like or creamy consistency.

Introduction

Rice enzyme cleansers have gained popularity in skincare due to their gentle exfoliating properties, skin-brightening benefits, and ability to cleanse without stripping moisture. This homemade rice enzyme cleanser is an all-natural, DIY alternative to commercial enzyme powders, offering a soft, foamy texture while gently removing impurities and dead skin cells.

Benefits of a DIY Rice Enzyme Cleanser

Brightens skin: Rice enzymes help fade dark spots and even out skin tone.
Gentle exfoliation: Natural enzymes break down dead skin cells without harsh scrubbing.
Soothes irritation: Ideal for sensitive skin, rice is known for its calming effects.
Hydrates the skin: Retains moisture, leaving skin soft and plump.
Boosts collagen: Rice contains antioxidants that support skin elasticity.


DIY Rice Enzyme Cleanser Recipe
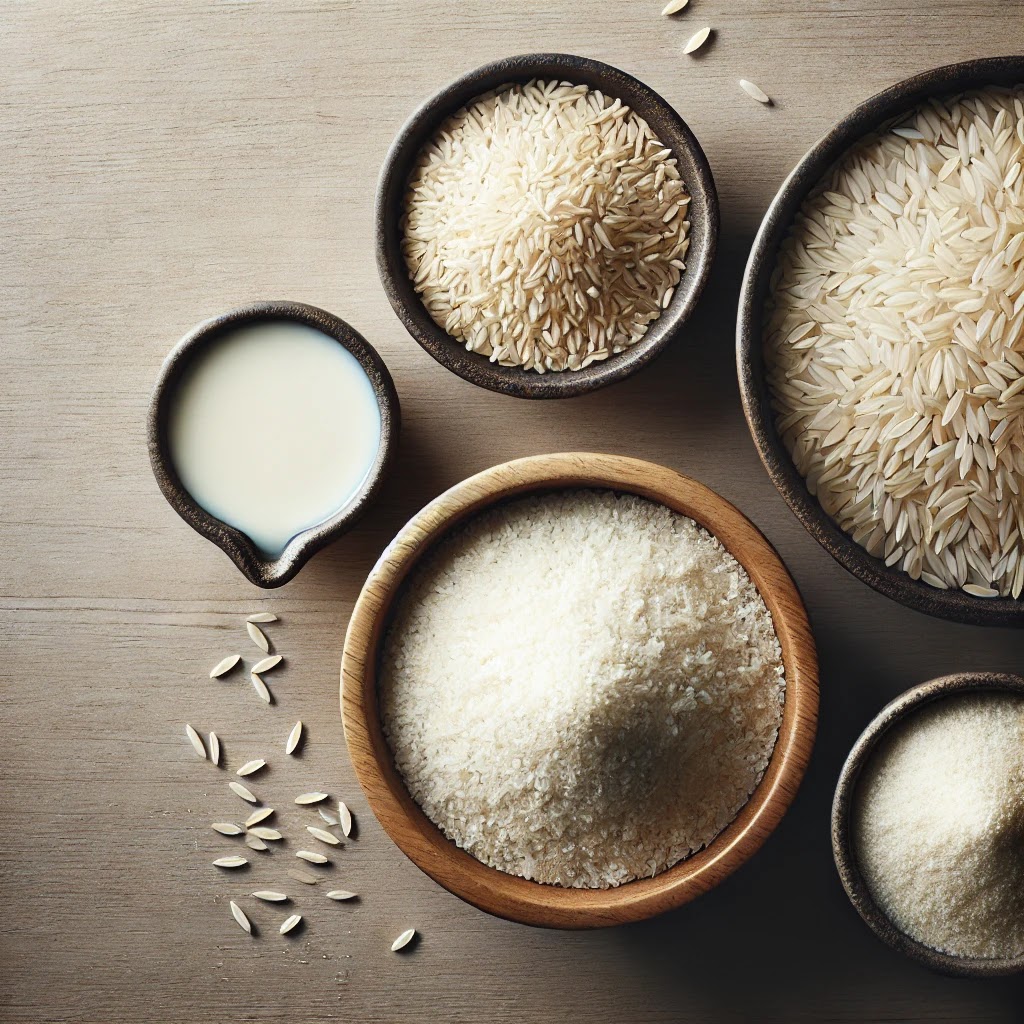
Ingredients:

  • 2 tbsp rice flour (or finely ground rice) – exfoliates and brightens
  • 1 tbsp oat flour – soothes and nourishes the skin
  • ½ tsp papaya powder (optional) – enhances enzymatic exfoliation
  • 1 tbsp kaolin clay – absorbs excess oil and impurities
  • ½ tsp coconut milk powder (or goat milk powder) – softens and hydrates
  • 1 capsule probiotic powder (optional) – boosts skin microbiome health

How to Make It:

  1. Grind rice (if using whole rice) into a fine powder using a coffee grinder.
  2. In a clean, dry bowl, mix rice flour, oat flour, papaya powder, kaolin clay, and milk powder.
  3. Stir well until all ingredients are evenly combined.
  4. Store in an airtight container in a dry place.

How to Use:

  • Take ½ teaspoon of the powder in your palm.
  • Add a few drops of warm water and rub between hands until it forms a creamy, foamy paste.
  • Gently massage onto damp skin in circular motions for about 30 seconds.
  • Rinse with lukewarm water and pat dry.
  • Follow with a hydrating toner and moisturizer.

DIY Mixing Process – It shows rice enzyme powder being mixed with water in a small ceramic bowl.

Customizations for Different Skin Types

✨ For Dry Skin: Add a pinch of honey powder for extra hydration.
✨ For Oily Skin: Add ¼ tsp activated charcoal to absorb excess oil.
✨ For Acne-Prone Skin: Add ½ tsp turmeric powder for its anti-inflammatory benefits.
✨ For Anti-Aging: Mix in ½ tsp matcha powder for antioxidants.


FAQs About DIY Rice Enzyme Cleanser

1. Can I use this cleanser daily?

Yes! It’s gentle enough for daily use, but if you have very sensitive skin, start with 2-3 times a week.

2. Does rice enzyme powder foam up?

Yes! When mixed with water, it creates a soft, foamy, marshmallow-like consistency, making it feel luxurious on the skin.

3. How long can I store this powder cleanser?

If stored in a dry, airtight container, it can last up to 3 months.

4. Can I replace papaya powder with something else?

Yes! You can use pumpkin enzyme powder or pineapple powder for similar exfoliating effects.

5. Is this cleanser safe for sensitive skin?

Absolutely! Just skip the papaya powder and keep the formula simple with rice flour, oats, and kaolin clay.

6. Can I make this into a wet cleanser instead of a powder?

Yes! Mix it with aloe vera gel or honey to create a pre-made paste, but store it in the fridge and use within one week.

7. Will this remove sunscreen and makeup?

It works well as a second cleanse but may not fully remove heavy makeup. Use a cleansing oil first.

8. Can I use this cleanser on my body?

Yes! It’s great for brightening dark areas like knees, elbows, and underarms.

9. What type of rice is best?

Use white rice for brightening, brown rice for extra nourishment, or black rice for added antioxidants.

10. Can I mix this with my regular face wash?

Yes! You can mix a pinch into your gel or foam cleanser for extra exfoliation.


Raw Rice and Powder Form – It shows rice grains and finely ground rice enzyme powder in small bowls.

Dos and Don’ts of Using a DIY Rice Enzyme Cleanser

✅ Do:
✔ Store in a dry, airtight container.
✔ Use clean, dry hands to scoop out the powder.
✔ Mix with lukewarm water for the best consistency.
✔ Follow with a moisturizer to lock in hydration.

❌ Don’t:
✖ Use on open wounds or active breakouts (enzymes may irritate).
✖ Add essential oils (they may cause irritation).
✖ Mix in advance with water (it will spoil quickly).


Conclusion

This homemade rice enzyme cleanser is a natural, affordable, and effective way to gently exfoliate and brighten your skin. With customizable ingredients, it suits all skin types and can be easily adapted for your needs. Try it out and enjoy softer, glowing skin.

 Diy Brightening Soap

Disclaimer

This DIY rice enzyme cleanser recipe is for informational and educational purposes only. It is not intended to diagnose, treat, cure, or prevent any skin conditions. If you have sensitive skin, allergies, or underlying skin conditions, please perform a patch test before using. Discontinue use if irritation occurs. Consult a dermatologist or skincare professional before adding new products to your routine, especially if you have pre-existing skin concerns.

This article does not replace professional medical advice. Always seek guidance from a qualified expert for personalized skincare recommendations.

Comments